
CLEANING AND MAINTENANCE
Cleaning & Maintenance — The Complete Kitchen Guide
A sharp knife that is stored badly becomes dull. A cast iron pan that is washed carelessly becomes rusty. A non-stick surface that is scratched with metal becomes a health concern and a culinary liability. The truth is that great kitchen equipment is only as good as the care it receives — and the difference between equipment that lasts a lifetime and equipment that needs replacing every few years comes down almost entirely to how it is cleaned, stored, and maintained. Here is everything you need to know.
How to Properly Clean and Store Your Knives
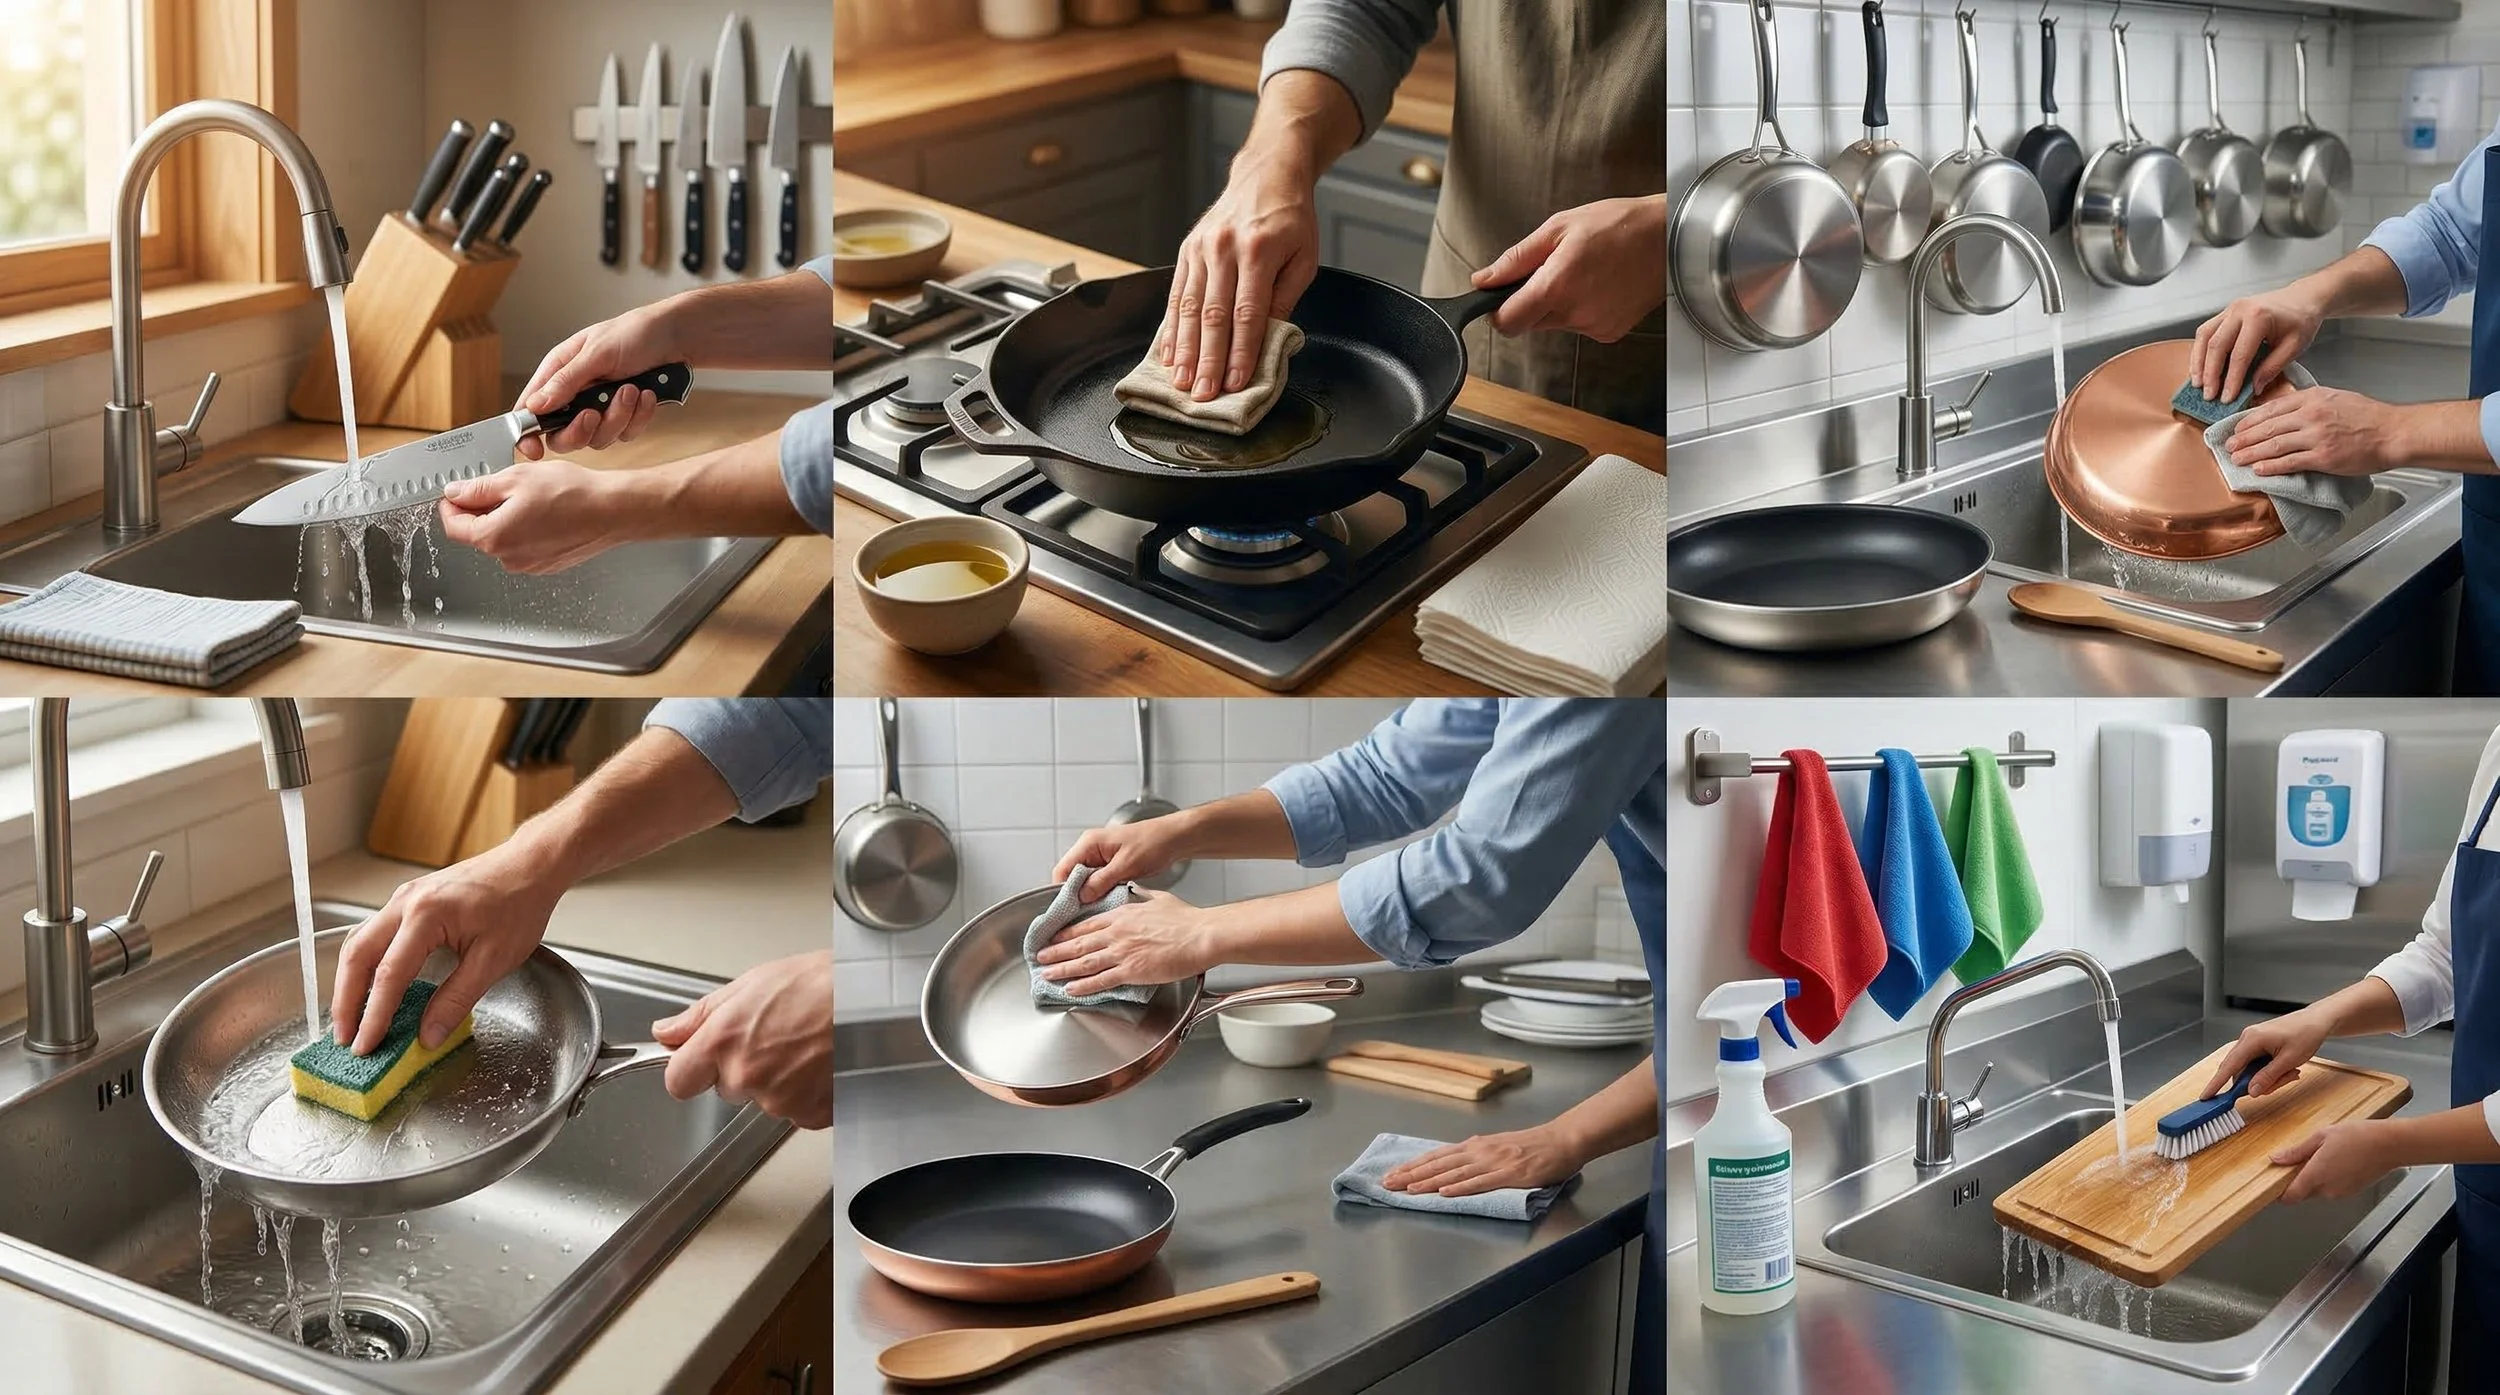
Knives are the most important tools in the kitchen and the ones that suffer most from poor care. A knife that is washed in the dishwasher, thrown loose into a drawer, and never sharpened is a fraction of the tool it could be — dull, damaged, and potentially dangerous. Proper knife care takes almost no time and makes an enormous difference to performance and longevity.
Washing Your Knives
The dishwasher is the single greatest enemy of a good knife. The combination of high heat, prolonged moisture, harsh detergent, and the physical rattling of the knife against other items in the rack damages the blade edge, degrades the handle material, and accelerates corrosion — even on stainless steel blades. After one dishwasher cycle a knife may look unchanged. After fifty, the edge is noticeably worse, the handle has loosened, and the blade has begun to show signs of pitting and discolouration.
Always hand wash your knives. Wash each knife individually under warm running water with a small amount of dish soap and a soft cloth or sponge — never a scouring pad or steel wool, which will scratch the blade surface. Pay particular attention to the area where the blade meets the handle — the bolster — where food and moisture can accumulate if not cleaned thoroughly.
Dry each knife immediately and completely after washing. Never leave a knife to air dry or sit in a drying rack — prolonged contact with moisture accelerates corrosion even on high-quality stainless steel. Use a clean, dry cloth and wipe from the spine of the blade down toward the edge — never draw the cloth along the edge, which risks cutting yourself and damaging the blade geometry.
Storing Your Knives
How you store your knives is as important as how you wash them. Loose in a drawer is the worst option available — blades knock against each other and against other utensils, damaging the edge and creating a safety hazard every time you reach in. Even a brief period of loose storage can undo a careful sharpening session entirely.
The magnetic knife strip is the preferred storage solution of professional chefs and serious home cooks. Mounted on the wall, it keeps knives visible, accessible, and completely separate from each other. The magnet holds each blade firmly without touching the edge. Knives stored on a magnetic strip stay sharper longer, are easier to find, and make the kitchen feel organised and professional. Ensure the strip is strong enough to hold your heaviest knife securely — a knife that can be knocked off the strip is more dangerous than a drawer.
The knife block is the most common home storage solution and a perfectly good one, provided it is used correctly. Always place knives into the block spine-first — sliding the blade edge along the slot wears the edge with every insertion and removal. Clean the slots of the knife block regularly — they accumulate crumbs, dust, and moisture that can harbour bacteria and transfer to clean blades.
Individual blade guards — simple plastic or leather sheaths that cover the blade — are the best solution for knives that need to be transported or stored in a drawer. They protect both the blade and whatever else is in the bag or drawer.
Sharpening and Honing
Understanding the difference between sharpening and honing is essential for proper knife maintenance — and the two are frequently confused.
Honing realigns the microscopic edge of the blade that bends and folds with regular use. It does not remove metal or change the geometry of the blade — it simply straightens the existing edge back into alignment. A honing steel should be used regularly — ideally before every cooking session. The technique is to hold the steel vertically with the tip on a stable surface, hold the knife at a consistent 15 to 20 degree angle to the steel, and draw the blade downward and across the steel from heel to tip in a smooth arc, alternating sides. Ten to fifteen strokes per side is sufficient.
Sharpening removes metal from the blade to create a new edge — it is a more significant intervention used when honing is no longer sufficient to restore performance. A whetstone is the most effective and precise sharpening tool available. Start with a coarser grit to establish the edge and finish with a finer grit to refine and polish it. Electric knife sharpeners are faster and easier to use but remove more metal per session and give less control over the final result. Pull-through sharpeners are the least precise option and should be avoided for quality knives — they remove excessive metal and produce a mediocre edge.
Most quality knives used regularly at home benefit from professional sharpening once or twice a year, supplemented by regular honing between sessions. A knife that is honed consistently will need sharpening far less frequently than one that is never honed.
Seasoning and Caring for Cast Iron
Cast iron is the most demanding cookware to maintain — and the most rewarding. A well-seasoned, well-maintained cast iron pan is a virtually non-stick, indestructible cooking surface that improves with every use and can last generations. The key is understanding what seasoning is, why it matters, and how to build and maintain it correctly.
What Seasoning Is
Seasoning is not a coating applied to the surface of cast iron — it is the surface itself. When oil is applied to cast iron and heated to above its smoke point, the oil undergoes polymerisation — the fat molecules bond together and to the iron surface, forming a hard, smooth, non-reactive layer. Each layer of polymerised oil adds to the one beneath, building over time into the deep, dark, slick patina that defines a well-seasoned pan.
A new cast iron pan from most manufacturers comes with a factory seasoning — a thin initial layer that provides some protection but needs to be built upon before the pan performs at its best. A cast iron pan that has been cooked in regularly for years has a patina built from hundreds of layers of polymerised oil — a surface that releases food cleanly, imparts no metallic flavour, and protects the iron from corrosion almost entirely.
How to Season a New or Stripped Cast Iron Pan
Step one — clean thoroughly: Wash the pan with hot soapy water and a stiff brush to remove any factory coating, rust, or residue. This is the one occasion when soap is appropriate for cast iron — during the initial seasoning process before a patina has been established.
Step two — dry completely: Place the pan over medium heat on the hob for several minutes until all moisture has evaporated entirely. Any remaining moisture will cause rust during the seasoning process.
Step three — apply oil: Using a folded cloth or paper towel, apply a very thin, even layer of neutral oil with a high smoke point — flaxseed oil, vegetable oil, or Crisco are the most commonly recommended options — to the entire surface of the pan, inside and out, including the handle. The layer must be extremely thin — if it looks oily, use a clean cloth to buff most of it off. A thick layer of oil will not polymerise properly and will produce a sticky, uneven surface.
Step four — bake: Place the pan upside down in an oven preheated to 230°C to 260°C. Place a sheet of foil on the rack below to catch any drips. Bake for one hour, then turn the oven off and allow the pan to cool completely inside the oven. The high heat polymerises the oil, bonding it to the iron surface.
Step five — repeat: Repeat the oil and bake process three to four times to build up an initial patina before cooking in the pan for the first time. The more layers you build before cooking, the better the initial performance.
Day-to-Day Cast Iron Maintenance
Cleaning after cooking: Clean cast iron while it is still warm — not hot enough to burn, but warm enough that residue hasn't fully set. Use a stiff brush, a chainmail scrubber, or coarse salt as an abrasive with a paper towel — all are effective without damaging the seasoning. For stubborn residue, add a small amount of water to the pan and bring it to a simmer on the hob to loosen stuck food before scrubbing.
The soap debate: The traditional guidance to never use soap on cast iron is based on the fact that older soaps contained lye — a strongly alkaline compound that strips polymerised oil from the iron surface. Modern dish soap is far milder and a small amount used occasionally will not significantly damage a well-established patina. That said, soap is unnecessary for routine cleaning and regular use will gradually degrade the seasoning. Use it only when genuinely needed.
Drying and oiling: After cleaning, always dry cast iron immediately and completely — either with a cloth or over low heat on the hob. Once dry, apply a very thin layer of oil to the cooking surface and buff it in with a clean cloth before storing. This thin maintenance coat protects the surface between uses and continues to build the patina over time.
What to avoid: Never soak cast iron in water — even briefly. Never put it in the dishwasher. Avoid cooking highly acidic foods — tomatoes, citrus, vinegar — in cast iron that is not yet fully seasoned, as acid strips the patina and can impart a metallic flavour to the food.
Dealing with Rust
Rust on cast iron is not a death sentence — it is a maintenance issue that is entirely reversible. Scrub the rust away with steel wool or a chainmail scrubber and warm water until the iron surface beneath is exposed. Wash, dry thoroughly, and re-season from scratch using the process above. A pan that has rusted badly may need several full seasoning cycles to restore full performance, but it will restore — cast iron is almost impossible to permanently destroy.
Pan Maintenance and Prolonging the Life of Your Cookware
Different cookware materials require fundamentally different maintenance approaches. Understanding what each material needs — and what it cannot tolerate — is the foundation of cookware that lasts.
Stainless Steel
Stainless steel is the most forgiving cookware material to maintain — it is dishwasher safe, highly resistant to corrosion, and tolerant of most cleaning methods. That said, maintaining its appearance and performance requires attention to a few specific issues.
Discolouration and rainbow staining: The blue, gold, and rainbow discolouration that appears on stainless steel after high-heat cooking is caused by heat oxidation of the chromium in the steel — it is purely cosmetic and does not affect performance. It can be removed with a small amount of white vinegar or a dedicated stainless steel cleaner applied with a soft cloth.
Stuck food: Soak the pan in hot water for fifteen to twenty minutes to loosen stubborn residue, then scrub with a non-scratch sponge. For very stubborn stuck food, add water to the pan, bring it to a boil on the hob, and use a wooden spoon to deglaze — the same technique used to make pan sauces lifts stuck food effectively. Avoid steel wool on polished stainless steel surfaces — it leaves fine scratches that dull the finish over time.
White mineral deposits: White spots and deposits left by hard water can be removed with a small amount of white vinegar or lemon juice applied with a soft cloth. These deposits are harmless but cosmetically unpleasant on a well-maintained pan.
Non-Stick Cookware
Non-stick cookware requires the gentlest maintenance of any pan type — and the most consistent attention to what is and isn't acceptable. A non-stick surface that is scratched, overheated, or treated with the wrong cleaning tools degrades rapidly and needs replacing.
Never use metal utensils: Metal spatulas, spoons, and whisks scratch the non-stick coating, exposing the base material beneath. Always use silicone, wood, or nylon utensils in non-stick pans — without exception.
Never overheat: Non-stick coatings — particularly PTFE-based coatings — begin to degrade at temperatures above around 260°C, releasing fumes that are harmful in an enclosed space and potentially toxic at extreme temperatures. Never heat a non-stick pan empty and never use one for high-heat searing or oven temperatures above 200°C.
Hand wash only: Non-stick pans should never go in the dishwasher — the high heat and harsh detergent degrades the coating significantly faster than hand washing. Wash with warm soapy water and a soft sponge — never an abrasive pad of any kind.
When to replace: A non-stick pan with visible scratches, peeling coating, or reduced non-stick performance should be replaced. Cooking on a damaged non-stick surface means consuming fragments of the coating — something no quality of maintenance can prevent once the surface is compromised.
Copper Cookware
Copper is the most visually spectacular and technically demanding cookware to maintain. It tarnishes quickly on contact with air, requires regular polishing to maintain its appearance, and must be lined with stainless steel or tin to prevent the copper from reacting with acidic foods.
Polishing: Copper tarnishes to a dark, dull finish when exposed to air and moisture. To restore its characteristic warm, bright shine, polish with a dedicated copper cleaner or a homemade paste of salt, flour, and white vinegar. Apply with a soft cloth in circular motions, rinse thoroughly, and dry immediately. Polished copper cookware is one of the most beautiful things in any kitchen — but it requires regular attention to stay that way.
Interior lining: The interior lining of copper cookware — typically stainless steel in modern pans or tin in traditional ones — requires its own maintenance. Tin linings are soft and can be damaged by metal utensils and excessive heat. A tin-lined copper pan should be re-tinned by a specialist when the lining wears through to the copper beneath.
Carbon Steel
Carbon steel maintenance sits between cast iron and stainless steel — it requires seasoning like cast iron but is lighter and more responsive to temperature changes. Season carbon steel using the same oil-and-heat process as cast iron. Dry thoroughly after washing, apply a thin maintenance oil after each use, and store in a dry environment. Carbon steel is more prone to rust than cast iron if left wet — always dry immediately and completely.
Kitchen Hygiene and Equipment Upkeep
A clean kitchen is a safe kitchen — and maintaining the hygiene of your equipment and surfaces is as important as any cooking skill. Foodborne illness is preventable, and the practices that prevent it are straightforward and consistent.
Cutting Board Hygiene
The cutting board is the piece of kitchen equipment most directly involved in food safety — and one of the most frequently mismanaged. The colour-coded board system used in professional kitchens exists for a very good reason — cross-contamination between raw proteins and ready-to-eat foods is one of the primary causes of foodborne illness in domestic kitchens.
Plastic boards are dishwasher safe and can be thoroughly sanitised at high temperature — making them the food-safe choice for raw meat, poultry, and fish. Replace plastic boards when they develop deep grooves that are impossible to clean thoroughly — bacteria establish themselves in these grooves and survive standard washing.
Wooden boards are excellent for bread, vegetables, and general food prep but are not appropriate for raw proteins — wood is porous and cannot be sanitised as thoroughly as plastic. Maintain wooden boards by washing with hot soapy water, drying immediately, and treating periodically with food-safe mineral oil or beeswax to prevent the wood from drying and cracking.
Surface and Equipment Sanitisation
There is an important distinction between cleaning and sanitising — one that professional kitchens understand and enforce strictly. Cleaning removes visible dirt and food residue. Sanitising kills the bacteria that remain on a visibly clean surface. Both steps are necessary — sanitising a dirty surface is ineffective, and a cleaned surface that is not sanitised may still harbour harmful bacteria.
For home kitchens, a dilute solution of food-safe bleach — one teaspoon per litre of water — applied to surfaces after cleaning and allowed to air dry is an effective sanitising step for high-risk areas like chopping boards and countertops used for raw protein prep. Commercial kitchen sanitiser sprays are a convenient and effective alternative.
Equipment Storage and Organisation
Clean equipment stored badly becomes contaminated equipment. Knives stored in a block that is never cleaned accumulate bacteria in the slots. Pans stacked without protection scratch each other and transfer residue between cooking sessions. Utensils stored in a container that is never washed harbour bacteria in the base.
Clean your knife block, utensil holder, and pan storage area regularly. Wash the slots of a knife block with a bottle brush and hot soapy water, rinse thoroughly, and allow to dry completely — ideally in a warm oven — before replacing the knives. Line pan stacks with clean cloths or dedicated pan protectors to prevent scratching and contamination between uses.
Cleaning Your Oven and Hob
The oven and hob accumulate grease, carbon, and food residue that, beyond being unsightly, become a fire risk if allowed to build up significantly. Clean your hob after every cooking session — warm surfaces clean far more easily than cold ones, and a quick wipe after cooking prevents the build-up that requires aggressive cleaning to remove later.
Clean your oven regularly — a light clean monthly and a deep clean every three to six months depending on use. Avoid oven cleaning products that contain harsh caustic compounds wherever possible — they are effective but require careful handling and thorough rinsing. A paste of bicarbonate of soda and water applied overnight and wiped clean the following day is a gentler, effective alternative for moderate soiling.
Dishcloths and Sponges
The kitchen dishcloth and sponge are among the most bacteria-laden items in any household — and among the most consistently overlooked in terms of hygiene. A damp sponge left on the sink is an ideal environment for bacterial growth and should be sanitised daily — either in the microwave for sixty seconds when wet, in a dilute bleach solution, or in the dishwasher on a hot cycle. Replace sponges weekly or as soon as they develop any odour. Use separate cloths for wiping surfaces and drying hands, and wash all kitchen cloths at 60°C or above to kill bacteria effectively.
Appliance Maintenance
Small appliances — blenders, food processors, stand mixers, and similar — require regular, thorough cleaning to maintain both hygiene and performance. Disassemble all removable parts after each use and wash thoroughly. Pay particular attention to blade assemblies, gaskets, and seals where food residue accumulates and is difficult to reach. The motor housing of most appliances should never be submerged in water — wipe clean with a damp cloth only.
Descale your kettle and coffee machine regularly if you live in a hard water area — mineral build-up reduces efficiency, affects flavour, and shortens the life of heating elements significantly. A solution of equal parts white vinegar and water run through the appliance, followed by two full cycles of clean water, removes limescale effectively and inexpensively.
A well-maintained kitchen is not the result of obsessive cleaning — it is the result of consistent, simple habits applied after every cooking session. Sharp knives, well-seasoned cast iron, clean surfaces, and properly stored equipment are the foundation on which great cooking is built. Take care of your tools and they will take care of you — for years, for decades, for a lifetime.